Monday, February 6, 2012

Tutorial...Turn Your Jeans into a Skirt

Have you every wanted a jean skirt but couldn't find one? Or, do you have a pair of jeans you love but the pant legs or hem is worn out? Today I will give a simple tutorial on how to make your jeans into a skirt. 

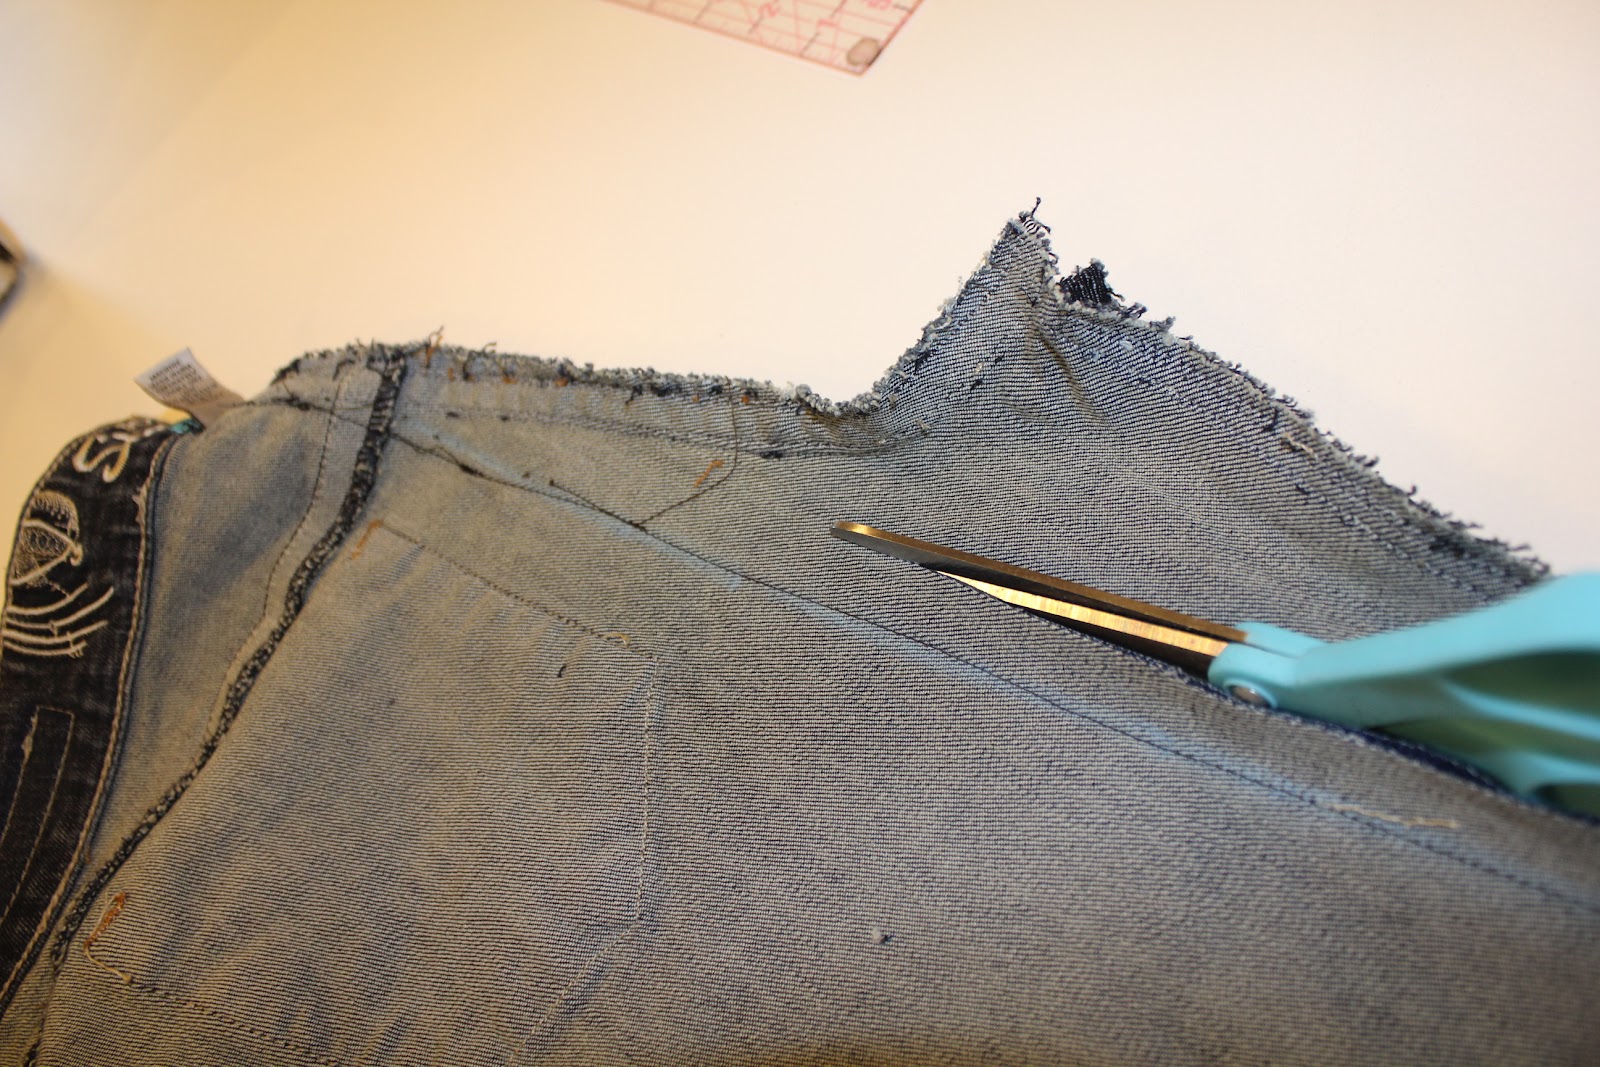
First start by ripping out the inseam of your pants. On the back rip to right below the belt loop and on the front rip to right below where the zipper ends.
 It should look like this when you are done ripping out
 Turn your pants inside out and draw a straight line starting right above where you finished ripping out. Mark it down to where the straight line meets your original seam.
 Sew right along your chalk line then trim your seam. You can also serge it.
 Find the length you want and chalk a line the trim your pants.
 Now they should look like this.
 Take the extra jean from cutting the length and put it under your front opening. When you have it placed chalk along the opening.

 Now you can cut the triangle shape it made. Be sure to cut 1/2" out from the chalk line so you have a seam allowance.

 Place your triangle piece back under your front opening and pin it in place.
 Top stitch down the triangle shape.
 You want to start the top stitching right below the zipper
 Here's how it should look now.
 Iron up your hem on the skirt
 Stitch in place.
 I used a top stitching thread which is thicker than regular thread. It gives it a nice look.
 Now top stitch your front "v" opening with your decorative top stitching thread.
 Now you are finished. Here's how mine looks!


Friday, February 3, 2012

Repaint...Redecorate...Reorganize

Yes, we were at it again. Something about me loves to redecorate and organize our shop. This time we went a little further and repainted the shop too. Our goal was to change it from being "girly" looking to very classy. After a couple weekends of working on the painting we finally finished it. I love how it turned out and if you like it too I provided the paint colors below. 

Paint Colors:
Martha Stewart: Wild Turkey (brown)
Martha Stewart: Driftwood Gray (blue)


We also did some redecorating. I changed the dresser to Spring decor (since we are definitely ready to be done with winter ;-)

Then we made a chalkboard out of a picture we had sitting around. You can get chalkboard paint from Home Depot or Lowes. I just painted right over the glass of the picture and it worked perfectly! It makes a great centerpiece for this new work area.

For our fitting room we made vintage looking hooks. We bought some wood plaques from Joann Fabrics and painted them white. We found these vintage looking door knobs at Anthropologie and attached them to the plaques. Now we have some great hooks for the dressing room!


We moved our trims shelf to the wall opposite the fitting room wall so you don't see it immediately when you walk in the sewing studio room. With the new paint color the colors pop off the wall so nicely!

Tuesday, January 31, 2012

Tuesday Tips for Better Sewing

What difference can pressing a seam make? Believe it or not pressing is one of the major differences between a professional seamstress and beginner. When every seam is pressed it creates a smooth, almost invisible finished look. When they are not pressed you tend to notice all the seams more, they are bubbly and not flattering to the garment. I like to press all my seams open. This creates less bulk in the garment for a more comfortable wear.


You just have to make pressing a habit. It will become a sewing lifestyle that you cannot live without. 

Thursday, January 26, 2012

Twins 1st Birthday Outfits

A little more than a year ago we met a soon-to-be mom of twin girls. She started taking sewing lessons from us because she wanted to be able to make her little girls cute dresses and accessories. Now they are almost 1 year old so we had the privilege of creating their 1st birthday outfits. Included in the set was the tutu,  the embroidered onesie by Kirks Korner Embroidery, the tights and the headbands.

It was so enjoyable to watch them play together, although it was a little hard getting them to be photogenic for us!


Wednesday, January 18, 2012

A Singer Sewer...

This past weekend we helped my grandparents move to a smaller home. Among many of my grandma's collectibles was a beautiful antique Singer sewing machine. She still used it sometimes for mending and hemming so she wasn't ready to give it away til now because she has granddaughters to do that for her! Saturday we got to take it home with us. We tried to look up some history about it. We didn't find too much about the specific model of machine except that it was made some time around the1920's. Right now it is a beautiful display in our shop but maybe soon we will actually use it a little just for fun. Having to push the treadle definitely gives you a good calf work out so maybe if I feel like getting some exercise I will use it. 


In one of the drawers we found a box full of feet and accessories.


Friday, January 13, 2012

From Picture to Reality...Custom Women's Dresses

Do you ever find that perfect dress online but end up disappointed because they don't have your size or it's so expensive, or it's too short? Well don't be discouraged, we specialize in taking photos of that dream dress and creating your own dress into a reality...or I might say, even better than reality :-)


Our friend Molly came to us with this problem. She found a dress online, then beginning with that dress she designed the perfect one for her style with details and trims to enhance it. The first one was a vintage style dress. It has a chiffon bodice with a embossed velvet rose suiting for the skirt. The original dress was from Modcloth.


Here's the first dress we started off copying


Here's our rendition...we added lace around the collar and cuff.

And here's the 2nd dress we copied.

It is 100% dupioni silk with authentic antique lace in each pin-tuck.

Tuesday, January 10, 2012

Custom Wedding Gown Finale!

Back in the summer we began creating a custom wedding gown. The original design of the dress was an "a line" dress, straight neckline, and long sleeves. As the dress took shape and fittings were done, the design gradually evolved. The neckline was changed to a slight sweet heart shape, a pleated sash was added to define the waistline, simple beading was added to the bodice and a pick up to the back of the dress. These design elements helped give this dress the simple elegance our bride wanted. After adding those elements we all agreed that more beading on the bodice would be stunning and a beaded train would add the finishing touch. It was amazing to see the transformation this dress took. The bride loved it and it was perfect for her autumn wedding day!