Showing posts with label custom adult clothing. Show all posts

Monday, January 5, 2015

The Handknit Hat...

Happy New Year everyone! Hope you all enjoyed your time with family and friends over the holidays. With so many days off  enjoy knitting. What I like to make most are hats. You can knit intricate designs, learn new techniques, but not have a long drawn out project. Most the time I can get a hat done in one or two days, depending on how much time I have.

This particular hat was made with 100% alpaca wool. The way the yarn was spun made it the most soft yarn I have ever set hands on. It is simply gorgeous! I bought the pattern on etsy. It is knit in wedges, so I learned how that is done on this hat. The nice thing about each wedge being knit is you can change the size easily by knitting as many wedges as it takes to go around your head.

Anyways, here it is!


Tuesday, February 14, 2012

Tuesday Tips...Turning a fabric tube right side out

Have you ever sewn a strap or tie right sides together with one end closed and then had a hard time turning it right side out? Here is an easy way to do it. All you need for this is a large crochet hook or knitting needle! 

First, flip over the opened end of the tie/ strap and then place the tool that you are using, (in this case I am using a crochet hook) in between the flipped fabric and the non-flipped fabric. 


While gently pushing up on the tool, pull down on the flipped fabric. 

When you are finished, if you are using a tool with a pointed end you can lightly poke the corners to make them nice and square. 

If neither side of the strap/ tie is sewn shut than you can simply attach a safety pin to one side and flip it inside the strap. 

Then push the safety pin towards the opposite end of the strap. (This is similar to putting elastic through a waistband.) 

When you get to the end take out the safety pin and you are done. Voila!

Tuesday, February 7, 2012

Tuesday Tips...Understitching Your Lining

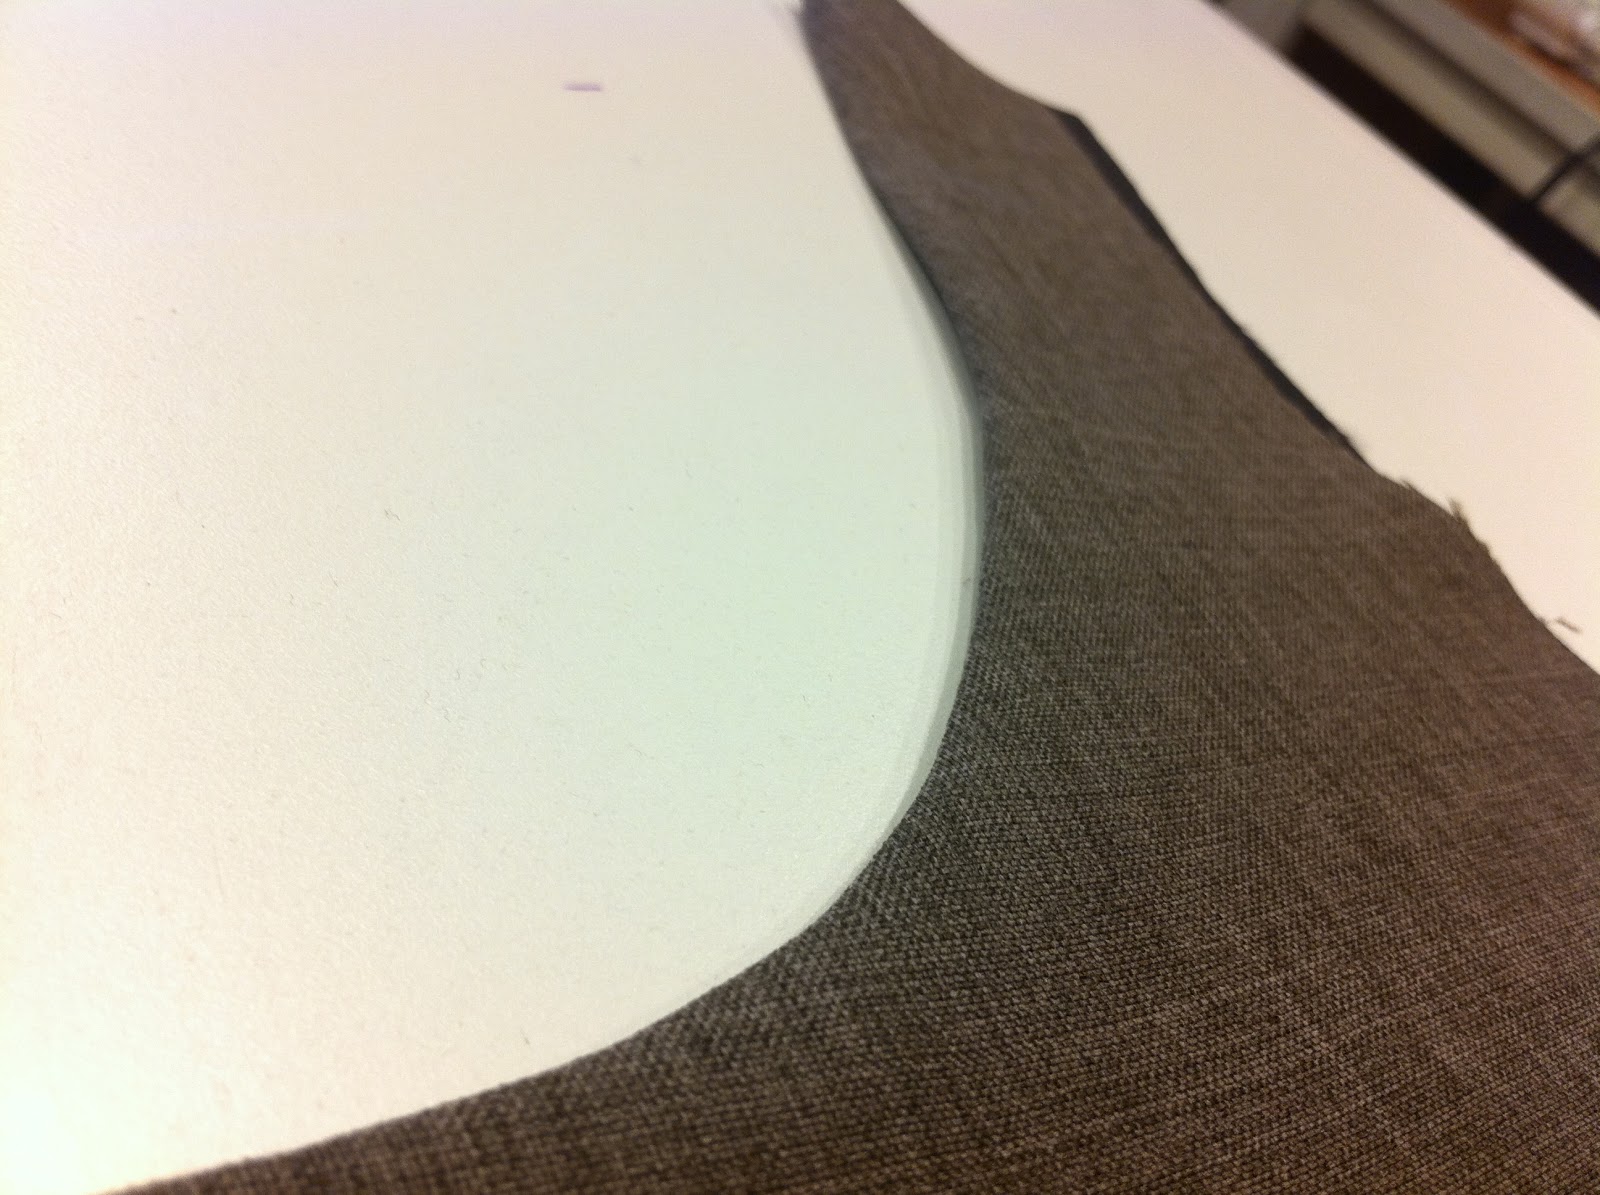
One very useful tip for sewing is to under-stitch when sewing a garment with lining. Under-stitching is used to hold down your lining so that it does not show and also to make the seam less bulky. This technique is often used on necklines. After connecting the lining to the main fabric, iron the seam and then turn the seam allowance so that it lies under the lining piece.


Next, sew the lining to the seam allowance an 1/8 inch away from your seam. Make sure that you only sew the lining and the seam allowance together, not the main fabric. (I used white thread so you could see it easily but a matching thread would be best)

When you are finished sewing press your lining.


When this is done you will have a beautiful neckline with no lining showing on the outside.

Monday, December 12, 2011

Heirloom Christmas Party Dresses...

The last couple of weeks we have been sewing up some Christmas party dresses. The thing I loved about both the styles we made, was that they were heirloom dresses. What I mean by that is, they have unique details that you would see on a lot of dresses in the olden days.

Pintucks on the bodice, with hand embroidery over top, dupioni silk, flat piping on the collar, sleeves and bodice, and buttons down the back instead of a zipper.


On the second dress, we made it of a chiffon bodice, with elegant long sleeves, and a cuff with lace and buttons. The collar is edged in the same lace as a the cuff, and the buttons down the center front complete the look. The skirt is made of a suiting material that has a rose velvet print over top.


All the details on these dresses display a vintage look, that is appealing to the modern eye.

Tuesday, November 29, 2011

HOLIDAY APRON GIVEAWAY...

Welcome to our first giveaway! We will be giving out a vintage inspired holiday apron. It's would be a wonderful addition to your collection of aprons or would make the perfect gift for a friend. The apron is made with 3 coordinating, Moda cotton prints. It is edged with an authentic antique lace. 

GIVEAWAY ENDS DECEMBER 7th
Rules: 
1 Entry: Leaving a comment
2 Entries:
Becoming a new follower

1 Extra Entry: {FACEBOOK} about the giveaway with a link back here and mention Bella Jean Apron Giveaway in the update. (leave 1 additional comment saying you did this)
1 Extra Entry: "Like" Bella Jean Boutique on Facebook


1 person will be selected using Random.org and will have 72 hours to claim the prize or a new winner will be chosen.
PLEASE LEAVE YOUR EMAIL ADDRESS SO I CAN CONTACT YOU,
IF YOU DON'T LEAVE AN EMAIL ADDRESS, I WILL
PICK A NEW WINNER. 

Pin It


Linked to:
Whimsy Wednesday
Manic Monday
Made By you Monday
Made By Little Hands Monday
Craft O Maniac Monday

Tuesday, November 15, 2011

A Fall Dress, Cozy hats, new furniture!

Lately at Bella Jean we have been working on some fun fall items. We are making a custom dress for a customer. The unique thing about this dress is, it looks like a skirt and blouse, but it is really a dress! Corduroy is a great fabric for these fall days. It's soft and has great texture with the lines.


Knitting is also a nice hobby for these dark chilly evenings. The other night we made a hat for a friend. We used organic cotton yarn, which is super soft and has a wavy texture. It also is more eye catching to use different colors on one hat, so we used cream and pink, as well as a variegated yarn to spice it up. To top it off we added a large flower for the side. I think Maddie likes her hat!


We also acquired a new piece of furniture...It is another great little work station!

Monday, October 10, 2011

A recycled shirt...into a pillow

Do you have any shirts that you've had for a while, but you don't want to throw them away? Or a shirt you might be grown out of that has some sort of design or unique embellishment? Well don't throw it away, because today we are going to show you how to turn rags to riches. 


First off, measure your shirt across the shoulder area. With a straight edge draw a square using the dimension you just measured. Then cut the square out one layer at a time. This way you make sure that you are using the best part of the shirt. 


 Once you have both your squares cut, sew them with right sides together, leaving an opening on the bottom of the pillow to put a form in. 
Fill the pillow, and hand sew the opening.


As you see on our pillow, a button up shirt is perfect to use the buttons in the front, they make great added detail!

Friday, August 19, 2011

Completed Swiss Dot Eyelet Dresses

Last week we completed our dresses we made ourselves with the fabric from San Francisco. We added lace down the front of the bodice from the bag we were given of antique lace. We also added some other trims to give it a vintage dress look. Let me know what you think!


Friday, June 10, 2011

What went on this week!

This week we had a lot of orders for little children's clothing. A few baby dresses, one 8 yr. old dress and one toddler pageant dress. It's been a while since we had this many children's clothes to make in a week because mostly we either do alterations or custom adult clothing. Besides the little dresses we also had two custom women's dresses we made, a maternity jean skirt, doll dresses and a few other little things. It was definitely a cranking week and that's the way we like it. It was so much fun setting goals for ourselves everyday and trying to beat each goal. I think it helped us get more accomplished! 
All the little dresses we made!


Here you can really tell how small the dolls are!