Showing posts with label custom curtains. Show all posts

Monday, October 10, 2011

A recycled shirt...into a pillow

Do you have any shirts that you've had for a while, but you don't want to throw them away? Or a shirt you might be grown out of that has some sort of design or unique embellishment? Well don't throw it away, because today we are going to show you how to turn rags to riches. 


First off, measure your shirt across the shoulder area. With a straight edge draw a square using the dimension you just measured. Then cut the square out one layer at a time. This way you make sure that you are using the best part of the shirt. 


 Once you have both your squares cut, sew them with right sides together, leaving an opening on the bottom of the pillow to put a form in. 
Fill the pillow, and hand sew the opening.


As you see on our pillow, a button up shirt is perfect to use the buttons in the front, they make great added detail!

Tuesday, May 31, 2011

A Productive Memorial Day...

Since it was a holiday yesterday and we had lots to do before our open house this Thursday, we decided it was upgrade day for Bella Jean Boutique...My brothers Chris and Isaac did more of our trim and crown molding in our new area. It's amazing how nice you can make something look with crown molding!
Crown molding!


My dad and I took a trip to our local fabric store and got material for our fitting room curtain, as well as material for a project my dad wanted to do. (I don't think I could have gotten him to go with any other reason). We then headed off to Home Depot to get the materials for a new cutting table in our work area. I was so excited! Our old one had been around a little too long!
Materials for Cutting table


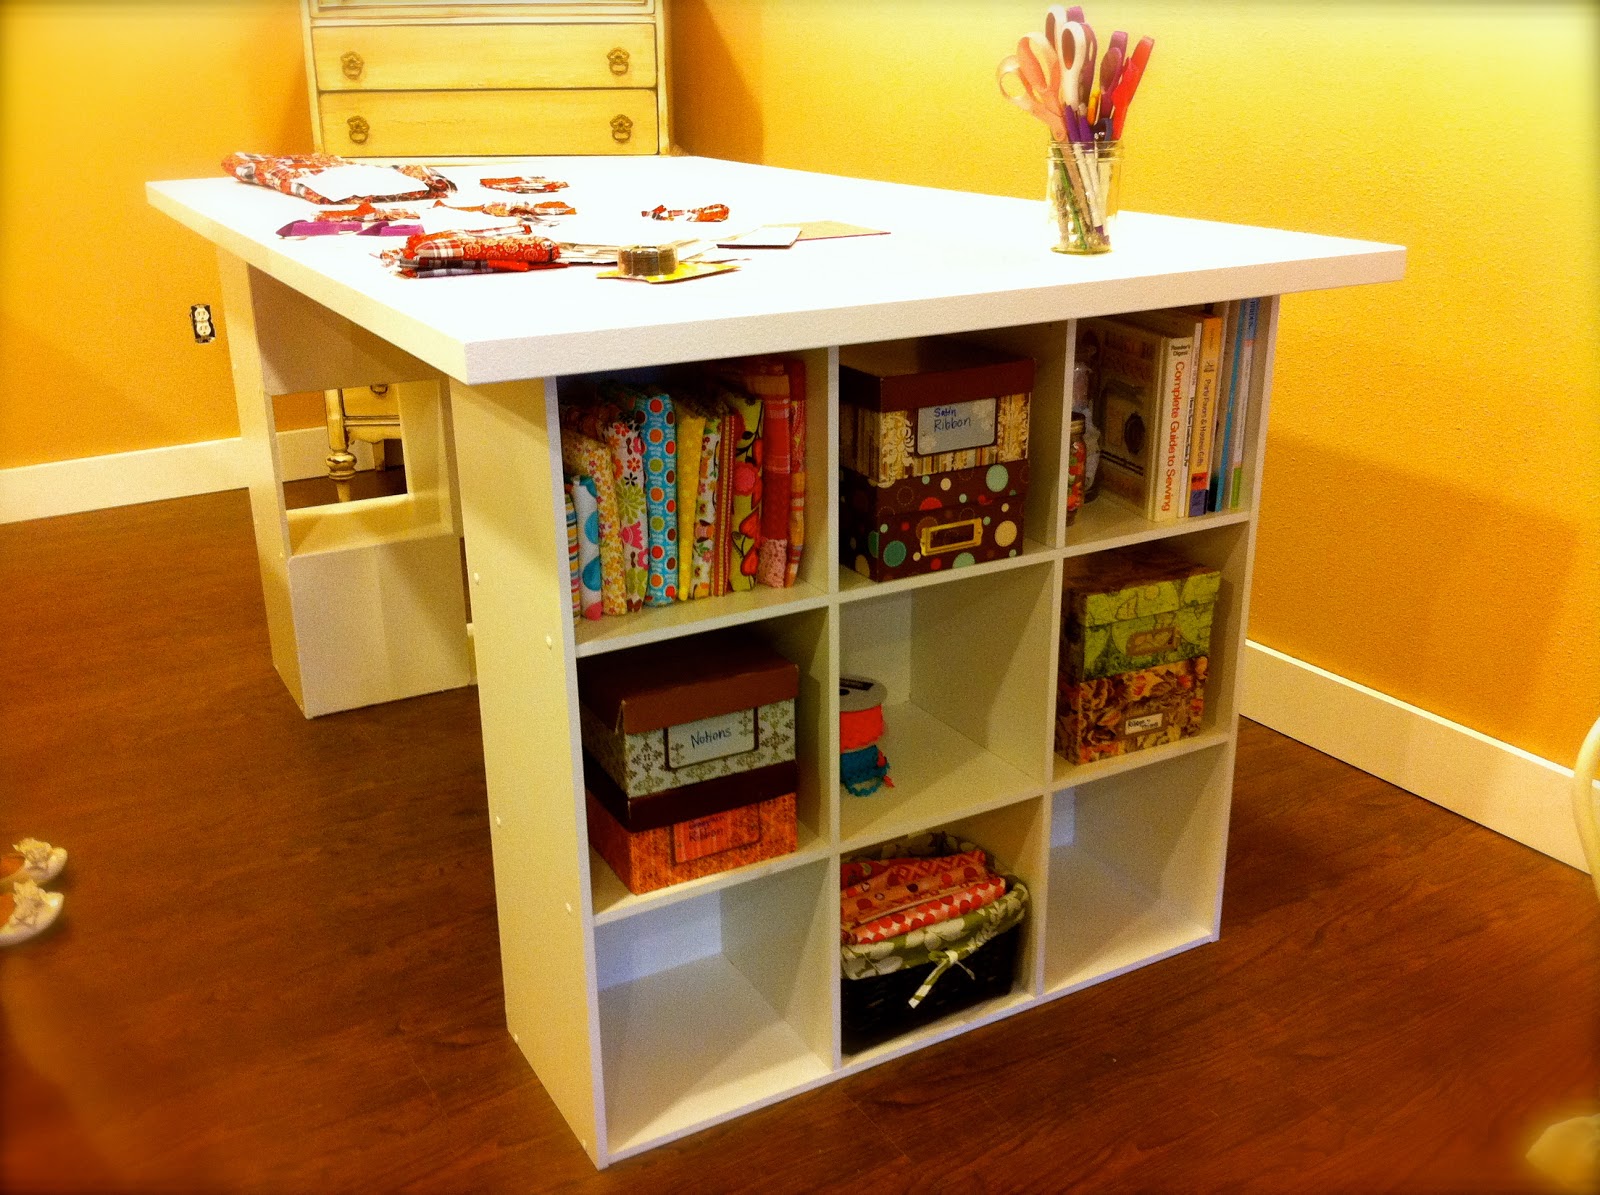
We found a picture of a cutting table we liked and copied it, with our own dimensions. If you want to make one, it actually is pretty easy! All you do is buy 2 cube organizers in the color of your choice. Then we got a melamine board for the table top...we made ours 3.5' x 6'...then we got a trim for around the edge to make the top look thicker.


We assembled the 2 cube organizers first, adding some wood glue in all the dowled areas to make it stronger.


We then placed them in the area we wanted them and set the melamine on the top. We centered it, marked it in case it shifted and began drilling holes up through the cubes into the top. Veronica went behind me and screwed all the screws in (of course using screws that were short enough to not go through the top).


Chris then put the painted trim all the way around in his professional contractor way. My dad painted the backs of the cubes white, as well as touched up the trim! We were done! A couple hour project and there you have a beautiful cutting table and much more needed storage space!


So don't forget to come check out our new area and improvements on Thursday and Friday June 2nd and 3rd from 10am-5pm...

Tuesday, April 26, 2011

Working with Plaid Material

We recently sewed plaid curtains for a customer. When working with plaid you have to be aware of so many different things before you make the first cut. First, make sure you are cutting along the straight plaid lines.
 Second, when making curtains you want to be sure your plaid lines on each curtain panel match up so when they are hanging they match evenly.
Next, when you go to cut it you only cut through a single layer of fabric (not 2 layers, how you normally would). This ensures that your plaid is cut straight.

I hope this helps you when working with plaid material. If you have any questions please feel free to email us!